-
Account


Planning Your Quote: Watch our Fence Builder Video Tutorial
The first thing that you will want to do before using the Fencing Direct Fence Builder (FDFB) program is to sketch the layout of your fencing project. Based on how you have designed the layout of your fence you will want to accurately record the measurement of each of those line segments, or fence runs as they are commonly called on your drawing. These measurements are what you will eventually use when creating the layout on the fence grid in the FDFB program. As you walk your project to determine where the fence will be placed it is important to note where you would like to install any gate(s). It is beneficial to decide what size gate(s) you will need (i.e. walk gate or double drive gate). Make sure to note the distance of the fence runs to the left and right of the gate’s placement after you decide on the gate’s overall width. You will want these measurements when drawing in the FDFB as well. Hint: Gates are best placed on the most level portion of the fence line for better function and ease of use.
Remember you can always modify the design layout. The important part is to correctly record the length of each fence run on your drawing. Once you have drawn the layout into the FDFB program the measurements and the overall configuration will be used to calculate a number of different items required for your project. These items are, but not necessarily limited to, the quantity and type of each post, gate(s), and sections.
Using the Fence Builder
The Fencing Direct Fence Builder home page has 5 parts: Objects, Gates, Grid Size Adjuster, Help and the Drawing Grid
Step 1 – Determining Grid Size: The grid size defaults to 100 x 100. However, you can adjust the grid size to various sizes by selecting the Grid Size Adjuster tab and selecting the desired scale to work from the menu.
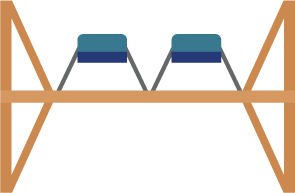
Step 2 – Placing Structures: Select the desired object from the menu shown. Using your mouse, left click to hold the object and then drag and drop onto the drawing grid in the desired location. Once on the grid you can left click and hold to move the structure if necessary. You can also change the size or rotate the object. To modify the size of the structure, left click on the one of the square sizing blocks and hold. Continue to hold the sizing bock and drag it to enlarge or minimize the object’s size. To rotate the object, left click and find the small circle just to the outside edge of the sizing blocks on the object then click and hold on the circle and rotate as desired. To delete an object click on the object and then hover over the trash can and left click to remove from the grid. Note: The sizing mode will remain displayed until you place your first fence post on the diagram at which time it will clear from the screen.
Step 3 - Drawing Your Fence: Move your cursor to the location on the grid where you want to place your first post. Left click to drop the post on the grid. Move your curser to either the left or right the desired distance and then left click to drop another post on the grid which will display your first line of fence with its length noted in the square box. To increase or decrease the distance of the run, left click and hold the last post added and drag the line until the desired footage is displayed in the box. If inadvertently you add a post by accident, it is simple to remove, just left click on the post then move your cursor to the trash can icon and click again to delete. If you want to move the whole line of fence click and hold on the line and drag to the new location. Continue to add additional fence runs in a similar manner by placing another post at yet another desired location in order to generate a new line of fence. Repeat this process until your drawing is complete. Please note: If you are making a complete rectangle drag the ending post over the start post. When you see the post turn red then let go.
Step 4 - Adding Your Gates: Click on the Gates tab at the top of the page. Left click the gate style and size you would like to add. The gate will appear in the top left side of the grid. Left click then drag and drop to the line of fence where you would like it located. Once the gate is placed on the appropriate line of fence it can be moved anywhere along that particular fence line by holding and dragging the gate to the desired location. You will note that adjusting the location of the gate also changes the footage of the fence runs left and right of the gate as depicted in the boxes showing the footages of the each fence run. You can add as many gates to each fence run as you want. If you need to delete one then left click on the gate and left click the trash can icon.
Completing Your Quote: When you are satisfied with your project’s layout, you can save the plan or create a quote. After creating the quote, you will have the options of downloading, emailing or loading your quote into the shopping cart.
Note: If you are having trouble using our Fence Builder tool, please make sure you are running the latest version of your browser and both your browser and desktop are at 100% zoom
Copyright 2026 · Fencing Direct. All rights reserved
