How Easy Is It to Install a Vinyl Fence?
Yes – and doing it yourself can save a lot of money!
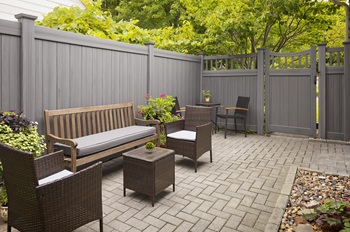
Vinyl fencing is a great choice for a good looking, durable material that will last through the elements, as well as being easy to install and maintain. You can get all kinds of different colors, shapes and sizes to fit whatever yard and need you to have, from tall white privacy fences to short decorative picket fences. And they are quite durable, withstanding everything from wind and rain to UV damage from the sun to salt or humidity. Part of the beauty is that you can install the vinyl fence, without needing to finish it, and it will stand up for years, whereas a wood fence might require consistent re-staining. All the maintenance for the vinyl fence amounts to hosing down dirty spots or a gentle scrub with soapy water for more persistent marks.
So it’s easy to install?
You may have the DIY experience to install the fence yourself with little to no help from us. But you don’t really need any experience to install the fence just fine by yourself. It may seem intimidating, but the hardest part is probably staking out the posts, which you’ll see is not very complicated at all, especially if you already have it planned out with the Fence Builder tool. Other than staking out the posts and pouring the Quickrete (mix and go), you just have to dig holes and slot pieces together. With some easy instructions, you’ll have your fence up in no time.
Not only is it cheaper to install yourself, but you also get a fun project to do outside and the feeling of satisfaction of improving your property, your castle, with your own two hands.
We’re also here to provide any help you need to get your fence up, from ordering to installation. There’s a feature on our website where you can map out your property--with your house, pool, deck, patio, etc.--and map out a path for your fence. The plug-in will use the map and fence selected in order to create an order list, with the exact materials you need to put up the fence, and the delivered final price.
We provide all materials you’ll need besides Quickrete and some tools you probably have in your garage right now. We also have some great, simple guides with pictures that you can follow no problem, not to mention our videos and the myriad Youtube videos available on the subject. And you should feel free to call us with any questions or concerns throughout the process, from designing and purchasing to installation. We’re the experts, so you can count on us for any information you might need about our products – especially with the installation, since we want you to be able to fully enjoy the benefits with as little hassle as possible.
So, how do you build a vinyl fence?
The first step is to come up with a plan for the fence, on your own or using our handy Fence Builder feature, and to have all the materials delivered and ready.
Then you want to mark out our plan on the property with string and line stakes, along with any gates or corners. The string should be taught between stakes so that you can tell the distance. Use the string, marking equal lengths of fence sections, to mark out post locations.
Start digging the holes! With a post hole digger, dig your holes so that you can fit about a third of the post in the ground, plus about 6 inches for a layer of gravel for drainage. Insert the post and make sure it’s level, then fill the hole with concrete. It helps to set the ending and corner posts first; that way, you can run another string between these posts to make sure the rest of the posts are in a good line with everything.
Once the posts are set, you can start inserting the boards to fill out the fencing. Start by attaching U-channels to two end boards, on the “tongue” side of the first board, and the “groove” side of the last board. Attach the first board so that the U-channel attaches it to the post, then insert the middle boards to the bottom rail, finishing with the “groove” side U-channel board. Glue the top rail onto the newly inserted boards, and you’re done with that section!
Some fence-top styles, like lattice top, closed top, open top, scalloped or arched, have an additional step of inserting another row of slots at the top, but that’s as easy as putting the boards onto the rail. Check out the vinyl fence installation PDF guide, on the “Resources” page of our website for instructions on how to finish each different style or anything else you need for the process.
If you don’t think you have the ability or the desire to install your vinyl fence by yourself, you could hire a contractor to do it for you. You’re still saving a lot of money by ordering materials from Fencing Direct and hiring a crew for the installation, avoiding the materials mark-up from a typical fencing provider. As Homer Simpson once said, “They charge for materials and labor. Pick one, jerks.” Since installing the fence is a pretty simple process, as we’ve seen from earlier, it doesn’t take a specialist to install it. You could probably get your neighborhood handyman to do it in an afternoon or a weekend.
So, you’ve already landed on two great options: vinyl fencing and Fencing Direct for your materials. We’re going to give you everything you need for your fence, and any information and support you may need to get it up. In addition to all the information on our website, feel free to reach out at any step for expert help.
