In today’s climate, no matter where you go in the United States, you will probably face weather storms. Storms are dangerous for people, but are also incredibly damaging to your property. A major storm can cause damage to your house, to your roof, to your landscaping, and to your fencing. When you leave your home, or another place of safety, after a storm, you always want to first assess any potential damage caused by the storm. Your initial feelings may center around feeling scared, overwhelmed, and exhausted. You may be wondering how you will be able to handle the stress and work surrounding fixing storm damage.
Addressing the damage to your fencing can seem incredibly daunting, but is very manageable. Our 5-step process is designed to help you figure out how you can best repair a fence that is damaged by a storm or other inclement weather. Especially if you have multiple repairs to do when faced with storm damage, a DIY project to repair a fence is very doable and manageable, and we at Fencing Direct are here to support you through the project.
This blog post is a sort of “Choose Your Own Adventure” to tackle fencing storm damage. To summarize the steps: first, you will assess the damage. Then, you will decide whether you want to repair or replace the fence. If you want to replace the fence, you’ll want to find the materials online at Fencing Direct, then order the materials. You’ll end with installing the fence.
Let’s take a deep dive into these steps!
Step 1: Assess the Damage
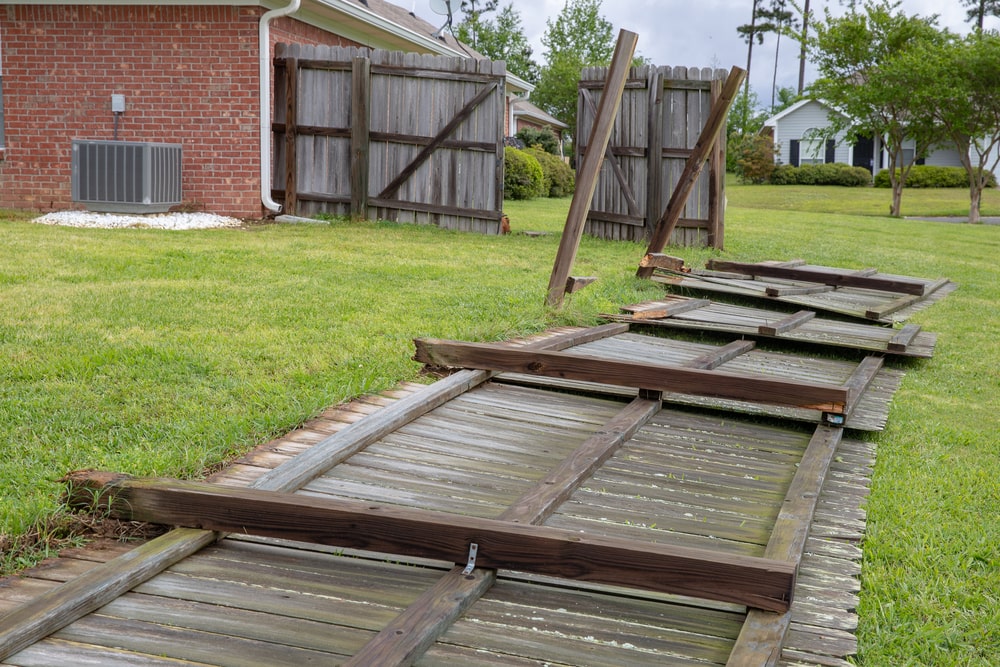
The first step is to, obviously, assess the damage. What about your fence is damaged? Are there broken or missing posts? Is part of your fence knocked over? Does there look like there will be a lot of water damage? There is a wide range of damage that can be caused by a storm, due to the nature of storms, so it is important to first assess what you will need to fix.
Step 2: Repair or Replace?
There is some type of damage that can make do with a simple repair. Maybe you are missing one or two posts, or maybe your fence will be revitalized with a coat of paint. These types of repairs tend to be smaller and easier to handle. Your local home improvement store can provide the supplies that you will need to repair a fence.
But sometimes, the damage is too great for a simple repair. Unfortunately, sometimes we may need to replace some or all of the fence. Replacing a fence is, of course, significantly more work, but very doable.
Replacing a fence is also an opportunity to upgrade your fence. Maybe you currently have a wooden fence. While a wood fence offers a very traditional and sophisticated look, wood fences are easily damaged and have a shorter lifespan than metal fences. Metal fences, specifically aluminum fences, are sturdy, long-lasting fences that are harder to damage, but easier to repair. If you currently have an aluminum fence, then you understand the quality that you choose when you invest in an aluminum fence.
Step 3: Find the Materials
The next step, and presumably the hardest step, is to find the materials you will need to build your fence. We, at Fencing Direct, have a Fence Builder software that allows you to figure out what material you will need and how much of the material is required to build your new fence. With images and examples, you can more easily imagine what the fence will look like on your property, and you can select the fencing that is the right fit for you and your home. While we do not build the fence for you, you can rest assured knowing that you have selected the best material and equipment to create a long-lasting, durable, and beautiful fence that will be the right fit for you.
Step 4: Order the Materials
Once you have decided on the material to order, your next step is to actually place the order! Double-check the materials that you will need, ensure that you have ordered the correct quantity, and (most importantly) get excited for your material arriving! In the meantime, you can take the time to buy any of the smaller materials you were not able to order from Fencing Direct. You should also ensure that you have enough time, whether you will be building the fence on a weekend or on a weekday, to properly build the fence. Having some websites open that can help you troubleshoot issues is important, too.
Step 5: Install Your Fence!
Once you have received your materials, your final step is to build the fence! You have spent much time planning the building, from assessing damage to ordering the material. The last step is to put it all together! Think back to where you were before, leaving your house after a storm to assess the damage to your home. Now, you are taking the reigns, and you are re-building your fence.
We want you to have the most support possible to build your fence. We will never send you materials and just throw you to the wolves. We have a boatload of resources available for you to get support while you are building your fence. Whether you are looking for a basic installation video, or you are looking to add a gate to your fence, or maybe you just need a basic checklist, we have it all!
Repairing a storm-damaged fence can be an emotionally draining process, but know that we at Fencing Direct are here to support you. Once you assess the damage done by the storm, if you feel like you need to replace your fence, we’ve got your back! Order your material through us, knowing that you will soon receive high-quality, durable material that will ensure your new fence lasts a long time.
