Split rail fences have been a classic option for American fences for generations. As one of the oldest and largest fencing companies in the country, we know exactly how to provide you with what you need. We can deliver you the highest quality products from the best American manufacturers as well as the best service. We have decades of experience in fencing, and even if you are doing a DIY project, we will be there to guide you through the process.
Maybe you want us to install a split rail fence for you, or maybe you’d prefer to do it yourself. Perhaps you’re just here looking for fencing options. Whatever the case, we have outlined everything that you need to know about split rail fences below.
General Information about Split Rail Fences
Split rail fences are also known as log fences, zigzag fences, worm fences, and snake fences. These types of fences are typically constructed in the United States and Canada and in forested areas. This is because split rail fences are made out of timber logs that are split vertically to serve as rails. Because of the large amount of wood that is used, these fences are perfect for regions that are abundant in timber.
Traditionally, split rail fences were made from American chestnut wood, but are now typically made from cedar wood. In either case, these types of wood are chosen for their easy-to-split, rot-resistant nature. However, because of the high-maintenance nature of wood fences, we recommend vinyl.
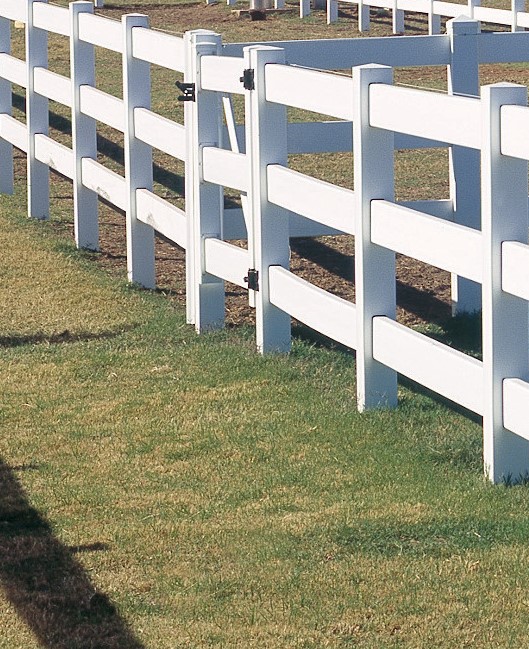
Some split-rail fences are straight, with the rails built parallel to each other between posts, and some are built in a zig-zag, criss-crossing fashion, so that the rails support themselves, discarding the need for any hardware.
Why you should install a split rail fence
There are a plethora of reasons to install a split rail fence. They are great for agriculture and give a classically American, rustic look. Split rail fences are especially beautiful around cabins, cottages, or country homes, but their simplicity and versatility means that they would look good anywhere. They are also very functional and are great for marking property lines, adding aesthetic value to your home, and keeping pets and children within your property.
A primary reason to install a split rail fence is their simplicity. Many forms of split rail fences, like the zig-zag type of split rail fence, do not even require hardware or any materials other than wood. This makes the installation cheaper and much easier, especially if you decide to carry out the installation yourself. Another way that split rail fences can make your life easier during the installation process, is that they can be installed even on very hard or rocky ground, which is rare for fencing.
An advantage that split rail fences offers in terms of security, is visibility. This means that you can quickly see and notice any intruders. The visibility aspect of split rail fences also makes it possible for you to enjoy the nature and scenery beyond your fence. If you want more security, it is very easy to install wire mesh to prevent intruders without blocking the view. Split rail fences are also very durable, which provides extra security. In addition to the durability, split rail fences are very easy to repair.
Styles for split rail fences
Simple, diagonal posts can be added to the zig-zag formation split rail fences in order to add that extra support. But this is optional and the diagonal posts do not need to be nailed into the fence, just leaned into the corners.
A more traditionally built split rail fence with parallel rails and intermittent posts can be built higher than the zig-zag type of split rail fences without using the same amount of timber. While these are often not as aesthetically pleasing, they are practical, functional, and less expensive because of the lower amount of timber used for construction.
Split rail fences can be built high or low to the ground. Low split rail fences are great for spaces like gardens, where you need containment but not a lot of security.
How to install a split rail fence yourself
The first step to installing a split rail fence yourself, is acquiring the materials. Even before you complete this step, however, you will want to measure out the area for where you want your fence so that you know how many materials you need to purchase. Here at Fencing Direct we have developed a modern and new state of the art quoting program that you can use for your DIY split rail fencing project. The program is called the Fencing Direct Fence Builder program, and is easy to find on our website. The program provides a detailed itemization of what you will need to build your fence.
In terms of which fencing materials to acquire, we have some suggestions. For wood, we would recommend cedar or pine. We would also recommend that your rails range from 8 to 11 feet long. In terms of the shape of your rails, however, there are plenty of options. Classic shapes for rails in a split rail fence are round, half round, diamond, or square. If you would like to install posts, then they need to range between 6 and 7 feet long and would need to contain 2 or 3 holes for the rails. There are also different types of posts. Corner posts would be used if you want to create a right angle in your fence. The holes would be drilled into adjoining sides. End posts are for the beginning and end of your posts. Only one side needs holes. You will mainly need line posts, which are used for support along a straight line. Holes need to be drilled all the way through between two opposite sides of the post.
When digging holes for your posts, you will want to make sure that a third of your post is in the ground for sturdiness. The holes will need to be around 10 inches wide. The first hole in the post should be at least 6 inches above the ground.
To plan your fence, insert the corner posts where you want them, and connect them with a wire so that you can plan where to place the line posts and ensure that they end up in a linear line. Place the first line post exactly in the middle of two corner posts. And then line posts in the middle of the corner posts and line posts.
Install the end posts first, to make sure they are in line. Ensure each post is centered and straight with a post level. Set the posts, and insert rails, checking the length and fit. Then fill the holes with soil and tamp.
